Say you're building a page in Weblingo or WebReports. Like most pages in Content Server, it probably contains a table to layout the data. Now you're staring at the screen and asking yourself: How do I make this look like a Content Server page?
Almost every page in Content Server is rendered with a table in one of two styles. Variations exists, of course, but they're all more or less:
- a list view, which summarizes a grouping of related items (e.g., browse view, audit data, etc.); or
- a detail (or "property") view, which provides details on a specific item (e.g., General tab, Records Detail tab, etc.); forms are usually rendered in this style as well.
Let's look at a screenshot of each.
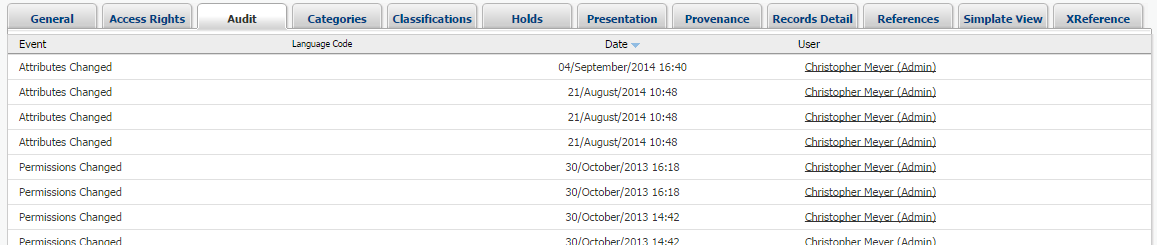
List View
An audit tab lists events in a table:
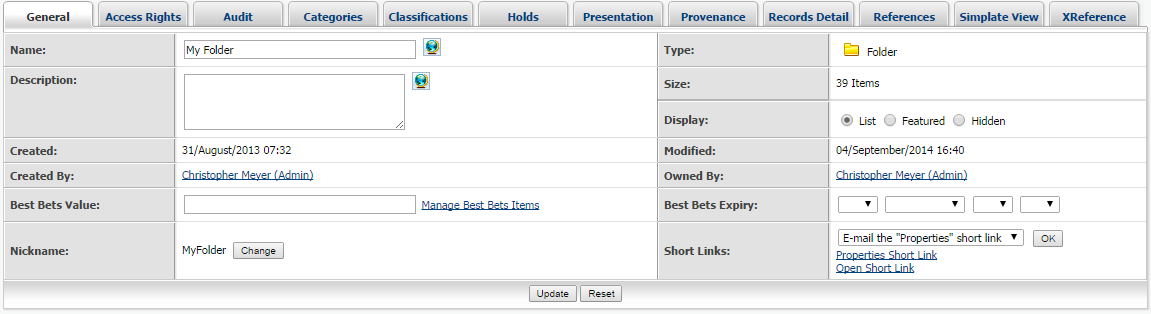
Detail View
A general tab displays information about a node, but also contains a few form elements:
These types of pages in Content Server are often a mashup of nested tables, inline styles, external CSS, and superfluous table and image elements to add separator lines, padding, or a shadow effect. For example:
<table width="100%" border="0" cellspacing="0" cellpadding="0">
  <tr valign="top">
    <td class="tblBackground" width="100%">
      <table width="100%" border="0" cellspacing="1" cellpadding="0">
        <tr>
          <td class="tblForeground">
            <table border="0" cellpadding="0" cellspacing="0" width="100%">
              <tr>
                <td>...</td>
                <td
                  class="labelVerticalDividerRight"
                  BACKGROUND="`ing`tbl-divider-ver.gif"
                  style="background-repeat: repeat-y;"
                >
                  <img
                    height="1"
                    alt=""
                    src="`img`spacer.gif"
                    width="2"
                    border="0"
                  />
                </td>
                <td>...</td>
              </tr>
            </table>
          </td>
        </tr>
      </table>
    </td>
  </tr>
</table>
2
3
4
5
6
7
8
9
10
11
12
13
14
15
16
17
18
19
20
21
22
23
24
25
26
27
28
29
30
31
I don't understand why it's done this way. Whatever the reason, it's complex and difficult to work with and much of it can be simplified.
This blog post introduces a cascading style sheet (CSS), which can be used to easily render a table in a style consistent with Content Server. The stylesheet is compatible with
# The Stylesheet
RHCore includes a CSS stylesheet named rhcore.css. The stylesheet simplifies the styling of many standard Content Server components, but also contains a number of presentational style classes (e.g., alignRight, floatLeft, width100, etc.) for quick and easy formatting. There is some debate whether presentational style classes are good practice or not, but I won't get into that here.
Let's look at how the stylesheet can be used to render a list and detail view:
# List Views
A list view rendered with rhcore.css looks something like the following. In the example we are using RHTemplate, but something similar could be done with WebReports or WebLingo:
<table class="rhtable rhstriped">
  <thead>
    <tr>
      <td class="minWidth">{% usemacro sortheader "subtype" "Type" %}</td>
      <td class="width70">{% usemacro sortheader "name" "Name" %}</td>
      <td class="alignRight">{% usemacro sortheader "size" "Size" %}</td>
      <td class="alignCenter">
        {% usemacro sortheader "modifydate" "Modified" %}
      </td>
    </tr>
  </thead>
  <tbody>
    {% for child in node.children|sort:request.sort %}
    <tr>
      <td>{{ child.img }}</td>
      <td>{% usemacro browselink child %}</td>
      <td class="alignRight nowrap">{{ child.size }}</td>
      <td class="alignCenter nowrap">
        {{ child.modifydate|date }} ({{ child.modifydate|timesince }})
      </td>
    </tr>
    {% endfor %}
  </tbody>
</table>
2
3
4
5
6
7
8
9
10
11
12
13
14
15
16
17
18
19
20
21
22
23
24
This renders a table like this:
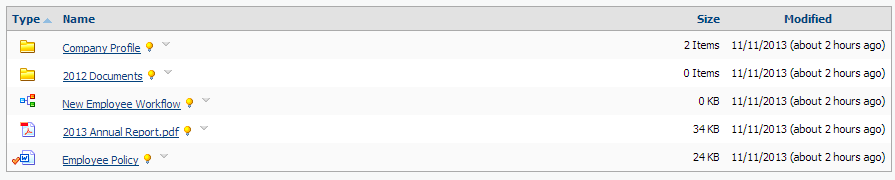
The main style is applied by the rhtable class, which cascades various styling rules to the table and its elements. Namely, it:
- adds a border around the table;
- sets a grey background on the header row;
- adds a line below the header to separate it from the rows;
- removes the underline on the header sort links; and
- sets padding within the cells.
Additional presentational styles are used to do specific formatting:
rhstriped- alternates the row colours;minWidth- sets the width to 1%;width70- sets the width to 70%;alignRight- aligns the cell contents to the right;alignCenter- aligns the cell contents in the center; andnowrap- prevents wrapping of the cell contents.
Now let's look at detail views.
# Detail Views
Detail views (which I also refer to as property views) are also easy to render with rhcore.css:
<table class="rhtable rhproperties">
  <tbody>
    <tr>
      <td>Key A:</td>
      <td>Value A</td>
    </tr>
    <tr>
      <td>Key B:</td>
      <td>Value B</td>
    </tr>
  </tbody>
</table>
2
3
4
5
6
7
8
9
10
11
12
This renders something as follows:

The rhtable class applies all the rules as described before, but we've now added the rhproperties class. This class adds the following:
- a grey background on the odd numbered columns; and
- a border around the cells.
The rhproperties class also supports multiple columns, which is easy to apply by just adding more cells to the row:
<table class="rhtable rhproperties">
  <tbody>
    <tr>
      <td>Key A:</td>
      <td>Value A</td>
      <td>Key B:</td>
      <td>Value B</td>
    </tr>
    <tr>
      <td>Key C:</td>
      <td>Value C</td>
      <td>Key D:</td>
      <td>Value D</td>
    </tr>
  </tbody>
</table>
2
3
4
5
6
7
8
9
10
11
12
13
14
15
16
This renders as follows:

You can also add a button bar with a <tfoot> section:
<tfoot>
  <tr class="buttonBar">
    <td colspan="4">
      <input type="submit" value="Save" />
      <input type="reset" />
    </td>
  </tr>
</tfoot>
2
3
4
5
6
7
8

# Wrapping Up
I find the stylesheet extremely useful since it allows me to quickly create tables without the fuss of hardcoded inline styles or deeply nested tables. The source is also highly readable, which makes it easy to debug and maintain. How easy is that?
Questions or comments about what you read here? Please leave a comment below.